
Hi all
Hope your doing well.. I would like to to thank all those visiting and trying my tutorials.
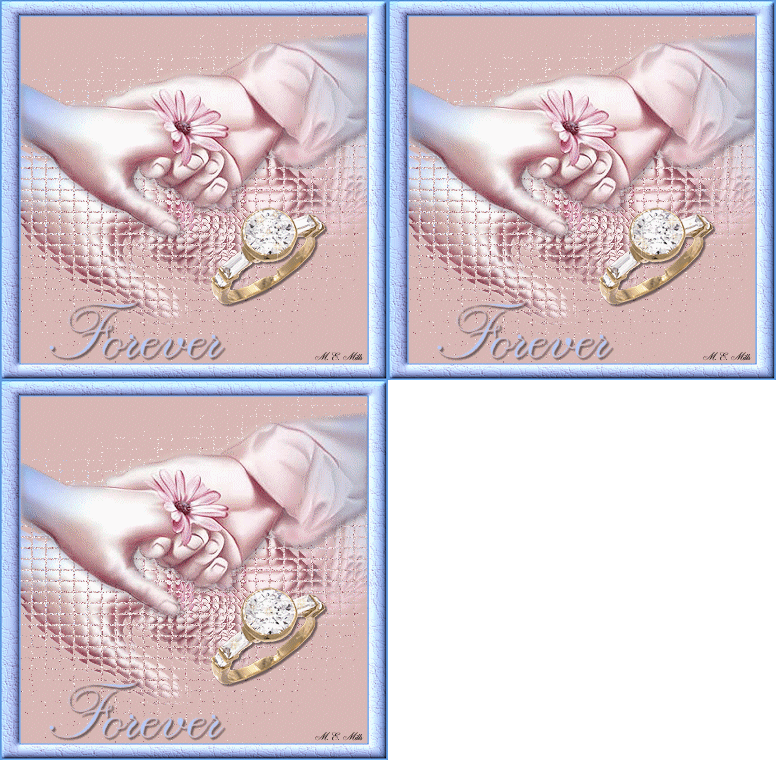
I've written a new tutorial and I hope you enjoy it. I've showed two versions one with sparkles and one without. I don't write tutorials yet for animation as I am still learning it sorry about that however for those that love sparkles and animation you'll find it pretty easy to do.
Thanks for looking
Hugs Michelle
My tutorials are of my own originality. Any similarities to any other tutorials is purely coincidental. I try to be copy right complaint at all times, I try to give credit where credit is due. Please make sure you read my Notes about my tutorials...It's on the right under My Tutorials. Thank you
Forever
Here’s my new tutorial
It’s all very simple and basic again.
You can add sparkles as well
This tutorial was written by Michelle Mills on 12th November 2008. Any resemblance to any other tutorial is purely coincidental. I claim all rights to this tutorial. Your results of this tutorial you are free to do with as you wish. This tutorial assumes you have a working knowledge of Paint shop Pro.
The results of this tutorial were done in Paint shop Pro Ultimate x2.
You can use my supplies provided or your own tubes http://www.mediafire.com/?sharekey=9a3332bb218e0ec0ab1eab3e9fa335cade270cda5b4f3867
Two tubes of choice and font of choice
I used Chuzzlewit SF
A Frame... The frame included is a basic frame I created please feel free to use or one of your own
Sparkle if you want to animate
Import your sparkle and your frame to PSP
Open a new 350x350 transparent image
Choose two colours from your tube going to use as main feature here I used #dab9b5 and #b7cbf9
Flood fill your transparent image with the pink colour and then copy and paste as new layer your main image I used the hands.
Duplicate your layer and then close the new layer temporarily.
Go back to the first image of the hands and go to effect>texture>mosaic glass with the following settings
Make sure symmetric is check and in number of columns put 30, glass curvature is 30, edge curvature 0, grout width two, grout diffusion 80
Open your top layer of the image and resize to 80% don’t forget to sharpen just once.
Make sure symmetric is check and in number of columns put 30, glass curvature is 30, edge curvature 0, grout width two, grout diffusion 80
Open your top layer of the image and resize to 80% don’t forget to sharpen just once.
Now move it up a little see my image for approximate location.
Add a drop shadow I used v&H 2, opacity 50 and blur 2, colour black.
Open your ring image and copy and paste as new layer.
Open your ring image and copy and paste as new layer.
Resize your ring to 50% and again don’t forget to sharpen just the once.
Move the ring down to the right a little see my image for aproximate placement.
Move the ring down to the right a little see my image for aproximate placement.
Then add a drop shadow.
Now add your frame.
I then had to manual colour correct my frame
Now add your frame.
I then had to manual colour correct my frame
so I chose manual target colour and in the source using the dropper chose the frame colour and in the target used the colour I was using on my tag click ok.
You can add text now if you like
You can add text now if you like
I wrote Forever using chuzzlewit sf at 72, smooth, stroke width .5 and created as a vector.
I then added drop shadow
and on new layer my watermark.
Save now your done
Hugs Michelle
For those that wish to add sparkle and animation can do so.. I don’t do tutorials for animation at this point as I’m still learning the ins and outs of it.
Thanks for trying my tutorial I hope you enjoyed it
Thanks for visiting
Hugs Michelle
Hugs Michelle
For those that wish to add sparkle and animation can do so.. I don’t do tutorials for animation at this point as I’m still learning the ins and outs of it.
Thanks for trying my tutorial I hope you enjoyed it
Thanks for visiting
Hugs Michelle









No comments:
Post a Comment