Friday 31 October 2008

New Tutorial - Autumn Guardian - FTU KIT

Hi All

Well here is the promised tutorial for Autumn Guardian, took little while for this one cause I managed to freeze my computer..
Please never ever forget to save.. I am bad for not saving as going along... lucky I have autosaves but still you always doubt..
Anyway here is the tutorial hope you have fun trying it and would love to see the results
Just small reminder of what I've said
The tag is called Autumn Guardian.
I am again using a scrapkit by Stacey that is a FTU kit and that can be found here www.snmcreationz.blogspot.com/ This scrapkit is just one part of Sweet -N- Sassy www.sweetnsassydigiscrappers.com/store/ Fall Blog Train so if you go to the link not only will you find other links for the blog train and the kit used in these tags but also other great scrapkits by Stacey.
Also in this Tag I used the beautiful artwork of Annika Smidt www.apfelkeks.de/
The template used was from dezigns by Ali www.designsbyali.blogspot.com/
Please note I try to give credit where credit is due many graphics and tubes I recieve through groups and if I have failed to credit please let me know and I will do so or if you wish remove the item.
Thanks Hugs Michelle
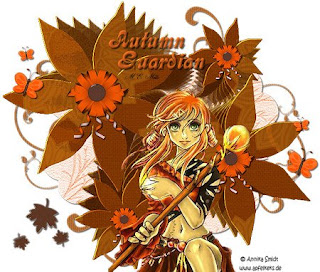


AUTUMN GUARDIAN

This tutorial was written by Michelle Mills on 31st October 2008. Any resemblance to any other tutorial is purely coincidental. I claim all rights to this tutorial. Your results of this tutorial you are free to do with as you wish. This tutorial assumes you have a working knowledge of Paint shop Pro. The results of this tutorial were done in Paint shop Pro Ultimate x2.
Hugs Michelle

I am using a plug-in on this tutorial called MuRa meister >copies

So we want to open our template duplicate and close the original. Open your scrap kit and also your Tube.
Delete the copyright layer of your template.
We’re going to work from the template so select your doodle layer and then selection> select all> float then open paper 3 copy then paste as new layer. Selection > invert and then delete. Select none and add a drop shadow of choice.
I used V&H 2, Opacity 60, Blur 2 colour Black. Go to doodle layer and delete. Raster 1 is now your new doodle layer can rename as such.
Go to shape layer and opening paper 6 do everything as previous instructions.
When done delete the shape layer and rename your raster layer shape if you like.
Go to Flower Shapes layer and select all>float>defloat and choose paper 5 do as before but stop after deselecting. Now we use plug-in MuRa meister> copies select our new flower shapes open your plug-in and use the following settings. Choose from your dropdown lists Feedback (Centre), Line, tile mode and behind
Your BG colour is white, Number 10, Shift x 4, shift y -16, angle 0,rotation 10, phase 0, cycle 0, attenuation 60, scale 20, tile gap 0, thru BG range 5, thru BG smooth 30, fade out 100, fade out to BG unchecked
Now go back to our flower shape template layer and select >float> defloat and open paper 2 copy and paste as new layer select>invert and then delete move this layer above our flower shape layer and use blend mode screen. Deselect and then delete the template flower shape layer.
Also delete template Circles as won’t be using them.
So now we have our doodle layer, shape layer, flower shape using plug-in and flower shape with blend mode screen. Can merge visible at this time
Open ribbon and bow element from your kit and we will copy and paste as new layer and then resize to 10% make sure resize all layers is unchecked. Adjust > sharpness> sharpen only once. Move this to the middle of the bottom left flower shape. Duplicate your layer and move the duplicate flower to the middle of the top right flower shape.
Now copy and paste as new layer again this time resize your image to 15% adjust sharpness once and move this image to the middle of top left flower shape and finally duplicate this layer and move the duplicate the middle of the bottom right flower shape. See my image for placement.
Close off your merged background so that just your ribbons a showing merge visible and then add a drop shadow. I use the same drop shadow throughout this tutorial.
Reopen your merged background. Now open your Tube and copy and paste as new layer and move it to where you think will look best then add any other elements you like... I used some butterflies and leaves just resizing and placing where I think they looked best. It’s your tag have fun.
When finished merge visible and resize don’t forget to adjust and sharpen just once, add your watermark and any text you like save your tag you’re done


Now don’t forget to save often during this unlike me...lol...better late than never for that warning...PSP froze on me whilst in the middle of re-trying my tutorial as I was writing it and I couldn’t get it to unfreeze and I’m just lucky I had auto save on everything...which allowed me to continue when I restarted my computer..Yea!!!! ..But I doubted for a minute there...SO MY ADVISE SAVE OFTEN!!!!!


Thursday 30 October 2008

New Results

Hi all

Well today just been playing in psp and have made a tag so I will be writing up the tutorial for it over the next day or so but thought I would post my results now.
The tag is called Autumn Guardian.
I am again using a scrapkit by Stacey that can be found here www.snmcreationz.blogspot.com/
This scrapkit is just one part of Sweet -N- Sassy Fall Blog Train so if you go to the link not only will you find other links for the blog train and the kit used in these tags but also other great scrapkits by Stacey.
Also in the second Tag I used the beautiful artwork of Annika Smidt www.apfelkeks.de/
The template used was from dezigns by Ali www.designsbyali.blogspot.com/
Please note I try to give credit where credit is due many graphics and tubes I recieve through groups and if I have failed to credit please let me know and I will do so or if you wish remove the item.
Thanks for taking a look and hope you'll come back to try the tutorial when it's written up
hug Michelle

New Tutorial- ICED ROSES

Hi All

I have written another tutorial tonight it's a little more detailed and I hope I've written it well enough to follow and get the results you like.

I have supplies for the tutorial and you can get them from here www.mediafire.com/?sharekey=9a3332bb218e0ec0ab1eab3e9fa335caafffbfe4aaf170d6

here is a picture of my results


Iced Roses
This tutorial was written by Michelle Mills on 29th October 2008. Any resemblance to any other tutorial is purely coincidental. I claim all rights to this tutorial. Your results of this tutorial you are free to do with as you wish. This tutorial assumes you have a working knowledge of Paint shop Pro. The results of this tutorial were done in Paint shop Pro Ultimate x2.
Hugs Michelle
You may use the tubes I attach or use your own you will need at least two tubes. Put the shapes in your preset shapes folder and put the mosaque09 into texture folder all tubes and supplies used in this tutorial I have received through groups. If they belong to you please let me know so I can credit you or if you wish remove the items.

Iced Roses Tutorial

Open a new 400x400 transparent image and from your tube that you use as background choose a light colour for foreground and dark colour for background
Colours I used are dcabb1 for foreground and b2b1c1 background.
In your foreground create a gradient with style of radial angle 0 and repeat 5
Flood fill your new image with the gradient then adjust> blur> gaussian blur of 10
go to effects>texture effects> texture, choose your texture from the texture box I used mosaque09 with the following settings;
Size 100, smoothness 0, depth 2, ambience 0, shininess 0, colour white, angle 315, intensity 50 and elevation 30.
Open your background tube copy and then copy and paste as new layer.
Adjust the size of your tube if necessary and then drop opacity to 20.
Now merge down and go to effects >browser effects >choose distortion effects> and then displacement maps> in your displacement maps choose the displacement map under ice; now click on modify and adjust these settings; Stretch to fit image blur 0, 3d surface, intensity 30 and check repeat.
You have a background

Add new layer and go to preset shapes and use altemusbordersfour or any shape you like.
With your mouse left button clicked pull out the shape, when it’s as large as you like let go of the mouse then object> align> centre in canvas.
Then right click layer and convert to raster.
Now image> mirror then merge down.
Duplicate the merged layer and image> free rotate left 90 degrees.
And merge down again.
Selection>float then selection> defloat flood fill the selection with your gradient.
Add new raster and and then open your second tube copy and copy and paste into selection. Deselect and merge down.
Use your effect browser again same settings as before with displacement maps under ice.
Copy and paste as new layer the same tube and resize to about 50% make sure you have unchecked resize all layers.
Adjust>sharpness and sharpen once.
Move your tube down so that it’s at the base of your ice shape see my image for placement. Duplicate layer. Merge all flatten
Image> add border of 2, symmetric checked with your dark colour and then repeat add border 2 with your light colour and again repeat and add border 2 with dark colour again.
Image add border using white with 10.
Using your magic wand with settings of replace, colour, tolerance 20 and contiguous checked, click inside your white border and then flood fill with your gradient.
Adjust> blur>guassian 10 and then inner bevel with the following settings;
Bevel 2, width 5, smoothness 13, depth 2, ambience 0, shininess 0, colour white, angle 315, intensity 50 and elevation 30 or choose any setting you like.
Add text if you wish.. add your watermark and save
Your done
Hope you enjoy this tutorial and thank you for trying it.


The following image is my first try at it a few weeks ago although not right can see that there are many possiblilties using many different shapes or variations on shapes

hugs Michelle

Tuesday 28 October 2008

New Tutorial TWO FACES

Well Hi again. I have written another tutorial tonight using a PTU scrapkit by Stacey at http://snmcreationz.blogspot.com/ please check out the site has some really great scrapkits on it.

I hope you enjoy this tutorial as much as I had writing it and love to see your results

Thanks and Hugs Michelle

TWO FACES

This tutorial was written by Michelle Mills on 28th October 2008. Any resemblance to any other tutorial is purely coincidental. I claim all rights to this tutorial. Your results of this tutorial you are free to do with as you wish. This tutorial assumes you have a working knowledge of Paint shop Pro. The results of this tutorial were done in Paint shop Pro Ultimate x2.
Hugs Michelle

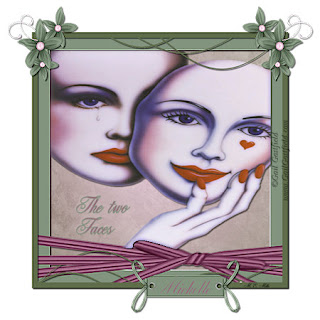
Here is a picture of my results


I have used a PTU kit by Stacey called Libra which you can purchase @ www.sweetnsassydigiscrappers.com/store/
I also used a plug-in called xeros that has porcelain but this is completely optional...I just love the results it gives
I have also used the beautiful artwork of Gail Gastfield @ http://www.gailgastfield.com/
First open the scrap kit and Your Tube of choice in Psp
Open a new 600x600 transparent image
Copy and paste Ribbon frame onto your new image and then image resize to 60% and uncheck resize all layers
Using your magic wand click inside the frame and also shift and click all the places where there are gaps around the bottom of the ribbon four little gaps. Now selections modify and expand by 3.
Copy and paste paper 7 then move it underneath the frame and keep the paper layer selected and selection invert and then hit your delete key and your paper should be under the frame and excess now removed. Deselect at his point but using your magic wand again select inside of your frame only and then select modify and expand by 3 again.
Now add new raster and send or move to the top open your tube and copy and then paste into selection on your tag. Deselect.
Add a drop shadow of choice I used V and H of 2, Opacity of 60 and blur of 2, colour black and now comes the optional part I have used xeros porcelain at default settings.
Now add a drop shadow to our frame I’ve used the same settings as above. Then merge down
Now open frame and copy and paste as new layer on your tag then resize to 60% making sure resize all layers unchecked and then add same drop shadow again to this frame
Now slightly tricky bit zoom into you tag as we are going to erase some of the frame in the bottom to weave into the ribbon again purely optional but I like the effect. Using a small erasing brush choose the pieces you’d like to look weaved through ribbon see image for which parts to weave now merge down again.
Now open your flower cluster and again copy and paste to your tag resize to 20% and then adjust sharpness sharpen just the once now flip and then image mirror and move to your left corner of your frame see image for placement. Duplicate your flower cluster layer and then image and mirror and merge down then add drop shadow again same as before.
Open pale green ribbon tag copy and paste as new layer and then resize to 30% adjust sharpness once move to the bottom of your frame between the ribbon see image for placement. Add the same drop shadow again and then optional again but zoom in and erase a small part of the ribbon to wrap the lager ribbon on the frame and erase a small amount of the green tag to look as if under the ribbon on the frame.. See image
Add some text to the tag either the word text included in the kit or your name choose colours from the frame I choose green as foreground and pink as background and added my name and then used drop shadow of V&H -2, opacity 60 and blur of 2 but colour foreground colour
Merge visible and resize your done Add your watermark and any copyright details

As this was very personal tag for me expressing the depression I suffer and the face of happiness I often display to the world I have added some text to the tag this is not necessary but entirely up to you
Thanks for trying this tutorial I hope you enjoy it
Hugs Michelle

My First tutorial for this site WINTER DANCE

Ok So here we go with my blog..lol..


Here is the first tutorial posted


This is only the second Tutorial I've written out


I hope you like it and enjoy


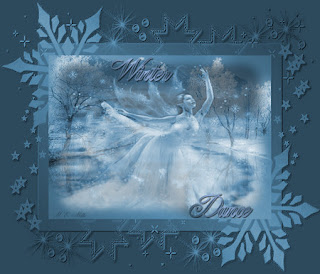
The Tutorial is Called Winter Dance
I have used a zuzzanna mask which you can find here
http://www.zuzzanna.dk/mask.html called zuzzanna_winther_mask
Tubes and Pictures used were sent to me by email. If they are yours let me know I'll credit you
or if you wish remove them


Winter Dance

This tutorial was written by Michelle Mills on 27th October 2008. Any resemblance to any other tutorial is purely coincidental. I claim all rights to this tutorial. Your results of this tutorial you are free to do with as you wish. This tutorial assumes you have a working knowledge of Paint shop Pro. The results of this tutorial were done in Paint shop Pro Ultimate x2.
Hugs Michelle


You may use the tubes and masked I used from here or use your own. http://www.mediafire.com/?sharekey=9a3332bb218e0ec0ab1eab3e9fa335ca69404c28e9ffa715
Open all tubes and mask in paint shop
Create a new image of 700x600 transparent
Choose 2 colours from your tube one light foreground, one dark background. The colours I have used are 97b3e2 foreground and 2d4a5c background.
Flood fill raster 1 with background colour and rename background
Add new raster and create gradient with your colours of linear angle 45, repeat 1, and invert checked. Now flood fill with the gradient.
Layers mask from image and from dropdown menu choose zuzzanna_winther_mask source is luminance and invert mask data checked. Then merge group rename mask and duplicate two times. You should now have background and three copies of your mask.
Close off background later and merge visible then add drop shadow of choice. My choice was V&H 1, Opacity 70, blur 1 and colour black
Optional. Use your select tool to outline the innermost frame of the mask
With your background tube of choice or one provided a(38) copy and paste as new layer. Fit almost perfectly here you can do what I have done invert and hit delete to remove anything outside your innermost frame or leave looks nice either way. Choose blend mode luminance
Now copy and paste your tube of choice or winterdance tube as new layer. I resized this layer 90%; you may or may not need to resize your tube of choice. Drop the opacity of layer my choice 65 but whatever you’re happy with, then change blend mode to luminance.
Optional. I used xeros plug-in and porcelain at default settings. This is not necessary and totally your choice or can change the settings of porcelain, entirely up to you.
If you haven’t reopened background layer do so now and then merge visible. Resize I went to 450 adjust sharpen once
Using font of choice added your text of choice and your watermark.
Font I used was ancestory SF at size 40 with a stroke of 1 leaving your gradient as foreground and dark background.
Add your drop shadow same as before. Save your work you’re done.

Well guess that's about it for my first post
Hope you enjoy the tutorial
Hugs Michelle

Welcome

Welcome to my blog...
I hope you'll enjoy it and have some fun.
Here I will try to post some Tutorials,
some of my creations and just instill
some of my insanity..
So sit down, relax and welcome to my Creative Mess
Hugs Michelle