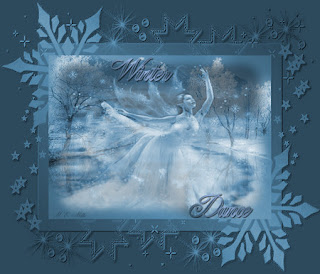
Here is the first tutorial posted
This is only the second Tutorial I've written out
I hope you like it and enjoy
The Tutorial is Called Winter Dance
I have used a zuzzanna mask which you can find here
http://www.zuzzanna.dk/mask.html called zuzzanna_winther_mask
Tubes and Pictures used were sent to me by email. If they are yours let me know I'll credit you
or if you wish remove them

Winter Dance
This tutorial was written by Michelle Mills on 27th October 2008. Any resemblance to any other tutorial is purely coincidental. I claim all rights to this tutorial. Your results of this tutorial you are free to do with as you wish. This tutorial assumes you have a working knowledge of Paint shop Pro. The results of this tutorial were done in Paint shop Pro Ultimate x2.
Hugs Michelle
You may use the tubes and masked I used from here or use your own. http://www.mediafire.com/?sharekey=9a3332bb218e0ec0ab1eab3e9fa335ca69404c28e9ffa715
Open all tubes and mask in paint shop
Create a new image of 700x600 transparent
Choose 2 colours from your tube one light foreground, one dark background. The colours I have used are 97b3e2 foreground and 2d4a5c background.
Flood fill raster 1 with background colour and rename background
Add new raster and create gradient with your colours of linear angle 45, repeat 1, and invert checked. Now flood fill with the gradient.
Layers mask from image and from dropdown menu choose zuzzanna_winther_mask source is luminance and invert mask data checked. Then merge group rename mask and duplicate two times. You should now have background and three copies of your mask.
Close off background later and merge visible then add drop shadow of choice. My choice was V&H 1, Opacity 70, blur 1 and colour black
Optional. Use your select tool to outline the innermost frame of the mask
With your background tube of choice or one provided a(38) copy and paste as new layer. Fit almost perfectly here you can do what I have done invert and hit delete to remove anything outside your innermost frame or leave looks nice either way. Choose blend mode luminance
Now copy and paste your tube of choice or winterdance tube as new layer. I resized this layer 90%; you may or may not need to resize your tube of choice. Drop the opacity of layer my choice 65 but whatever you’re happy with, then change blend mode to luminance.
Optional. I used xeros plug-in and porcelain at default settings. This is not necessary and totally your choice or can change the settings of porcelain, entirely up to you.
If you haven’t reopened background layer do so now and then merge visible. Resize I went to 450 adjust sharpen once
Using font of choice added your text of choice and your watermark.
Font I used was ancestory SF at size 40 with a stroke of 1 leaving your gradient as foreground and dark background.
Add your drop shadow same as before. Save your work you’re done.
Well guess that's about it for my first post
Hope you enjoy the tutorial
Hugs Michelle


No comments:
Post a Comment