I hope you enjoy this tutorial as much as I had writing it and love to see your results
Thanks and Hugs Michelle
TWO FACES
This tutorial was written by Michelle Mills on 28th October 2008. Any resemblance to any other tutorial is purely coincidental. I claim all rights to this tutorial. Your results of this tutorial you are free to do with as you wish. This tutorial assumes you have a working knowledge of Paint shop Pro. The results of this tutorial were done in Paint shop Pro Ultimate x2.
Hugs Michelle
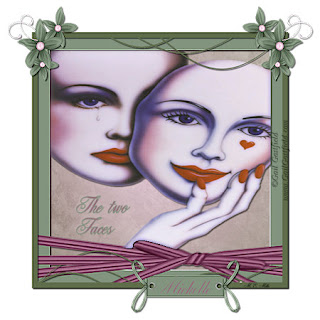
Here is a picture of my results

I have used a PTU kit by Stacey called Libra which you can purchase @ www.sweetnsassydigiscrappers.com/store/
I also used a plug-in called xeros that has porcelain but this is completely optional...I just love the results it gives
I have also used the beautiful artwork of Gail Gastfield @ http://www.gailgastfield.com/
First open the scrap kit and Your Tube of choice in Psp
Open a new 600x600 transparent image
Copy and paste Ribbon frame onto your new image and then image resize to 60% and uncheck resize all layers
Using your magic wand click inside the frame and also shift and click all the places where there are gaps around the bottom of the ribbon four little gaps. Now selections modify and expand by 3.
Copy and paste paper 7 then move it underneath the frame and keep the paper layer selected and selection invert and then hit your delete key and your paper should be under the frame and excess now removed. Deselect at his point but using your magic wand again select inside of your frame only and then select modify and expand by 3 again.
Now add new raster and send or move to the top open your tube and copy and then paste into selection on your tag. Deselect.
Add a drop shadow of choice I used V and H of 2, Opacity of 60 and blur of 2, colour black and now comes the optional part I have used xeros porcelain at default settings.
Now add a drop shadow to our frame I’ve used the same settings as above. Then merge down
Now open frame and copy and paste as new layer on your tag then resize to 60% making sure resize all layers unchecked and then add same drop shadow again to this frame
Now slightly tricky bit zoom into you tag as we are going to erase some of the frame in the bottom to weave into the ribbon again purely optional but I like the effect. Using a small erasing brush choose the pieces you’d like to look weaved through ribbon see image for which parts to weave now merge down again.
Now open your flower cluster and again copy and paste to your tag resize to 20% and then adjust sharpness sharpen just the once now flip and then image mirror and move to your left corner of your frame see image for placement. Duplicate your flower cluster layer and then image and mirror and merge down then add drop shadow again same as before.
Open pale green ribbon tag copy and paste as new layer and then resize to 30% adjust sharpness once move to the bottom of your frame between the ribbon see image for placement. Add the same drop shadow again and then optional again but zoom in and erase a small part of the ribbon to wrap the lager ribbon on the frame and erase a small amount of the green tag to look as if under the ribbon on the frame.. See image
Add some text to the tag either the word text included in the kit or your name choose colours from the frame I choose green as foreground and pink as background and added my name and then used drop shadow of V&H -2, opacity 60 and blur of 2 but colour foreground colour
Merge visible and resize your done Add your watermark and any copyright details
As this was very personal tag for me expressing the depression I suffer and the face of happiness I often display to the world I have added some text to the tag this is not necessary but entirely up to you
Thanks for trying this tutorial I hope you enjoy it
Hugs Michelle


No comments:
Post a Comment