
Hi all
I've done a new tutorial tonight that doesn't require any scraps. You can use my supplies or most of them or your own
Hope your all having a great night and hope you enjoy the tutorial
Please note as always I try to give credit where credit is due but sometimes I don't have all the information . Due to the high number of tubes and graphics I recieve I sometimes don't get all information or I just don't know..Please if you see something I haven't credited properly a polite note is all it takes and I'm happy to credit properly or if it's yours and you wish I will remove the item.
Thanks all and I hope you enjoy
hugs Michelle
Summer Wishes
This tutorial was written by Michelle Mills on 10th November 2008. Any resemblance to any other tutorial is purely coincidental. I claim all rights to this tutorial. Your results of this tutorial you are free to do with as you wish. Please respect the TOU of the owner of the scrap kits I may use.
This tutorial assumes you have a working knowledge of Paint shop Pro.
The results of this tutorial were done in Paint shop Pro Ultimate x2.
Hugs Michelle
Supplies Zuzzanna_mask29 which you can get from here http://www.zuzzanna.dk/
I have included 3 tubes and 1 accent or can use some of your own supplies
A tube of your own choice apart from supplied
I have also used the beautiful artwork of AnaRasha http://www.anarasha.deviantart.com/
Plug-in used xero porcelain Optional
Font of choice I used chuzzelwit SF
As you can see by a lot of my work I love masks. I love playing with them and trying something new and yet I like them simple and just straightforward as well.
This is simple and straight forward..... I hope you enjoy
This is simple and straight forward..... I hope you enjoy
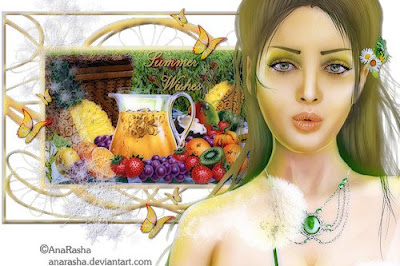
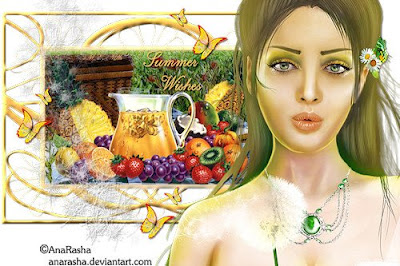
Two images are shown one with xero porcelain plugin. One without.
Open your tubes and accents and mask in PSP
Create a new 700x500 transparent image. We will be extending the canvas later.
Choose two colours from one of your tubes as this reminded me of oranges I decided to go for the fruit tube and orange colours.
Colours I choose foreground #ffce4d and background #fdbd63
Then make a gradient with foreground to background chosen, no angle, repeat 5, invert ticked, radial style.
Flood fill your image with the gradient. Go to texture effects> blinds and choose width 3, opacity 90, colour is your background colour, and horizontal ticked.
Go to layer>new mask>from image and from your drop down list select your mask and make sure source luminance and invert mask data are ticked.
Merge group and then resize your mask to 80% make sure resize all layers is not ticked.
Go to effects and add an inner bevel with the following settings Bevel 2, width 3, smoothness 40, depth 5, ambience 0, shininess 20, colour white, angle 315, intensity 50, elevation 30.
Add drop shadow I used V&H 2, opacity 50, blur 2, colour black
Choose your selection tool rectangle and replace, feather 0, anti alias checked we need to mark out the inside of the mask.
There is a naturally darker section line your selection tool and draw out rectangle for the darker section
Then add new raster layer and now open your background tube I used summer memories and copy and paste into selection.
Here I used xero porcelain at default however it’s not necessary.
Add new raster layer
Now open and copy and paste into selection your second tube. I used Lotsafruit.
Now open and copy and paste into selection your second tube. I used Lotsafruit.
Add your drop shadow to this tube.
Now merge visible.
We’re now going to extend the canvas so go to image> canvas size and in width put 750 and in height 500, make sure placement is the middle.
Move your frame to the left and raise it slightly.
See image for placement.
Now open and copy and paste as new layer your tube.
Mine is quite large but it fit perfectly I moved it slightly to the right.
Add your drop shadow.
Now open and copy and paste as new layer your accents I used a butterfly which I have included however it’s your tag use anything you like.
Now open and copy and paste as new layer your accents I used a butterfly which I have included however it’s your tag use anything you like.
I resized my butterfly to two sizes one 20% and one at 10% and I mirrored the smaller of the two then placed them as I liked.
See image for placement.
Don’t forget if you resize to adjust and sharpen just the once and also add your drop shadow to the butterflies.
Add a new raster layer if you wish to add text I did mine at about 36 and added a drop shadow
Then Merge visible and resize your whole image add your watermark and any copyright information
your done
I hope you’ve enjoyed this tutorial
Thanks for trying
Hugs Michelle
Thanks for trying
Hugs Michelle


1 comment:
Thank you! Your blog post will be advertised on the DigiFree Digital Scrapbooking Freebie search engine today (look for timestamp: 10 Nov [LA 08:00pm, NY 11:00pm] - 11 Nov [UK 04:00am, OZ 03:00pm] ).
Post a Comment