Saturday, 31 January 2009
New Tubes and Tags and Frames Freebie
Sunday, 25 January 2009
Creations
Saturday, 24 January 2009
Taken in
I feel bad about this but it seems that I may have created a tag that unfortunately may have stolen cute posers in them. Therefore I am removing the tag I created with that kit.
I had downloaded a kit in good faith from a site called http://sugarspicebrat.blogspot.com/ which is now shut down by the owner a few weeks ago..
but only today am I finding out this information that her creations may have or appear to be stolen unfortunately.
I have gotten information from Brandi's site http://brandiscreations.blogspot.com/ also from http://www.lassiesdesigns.com/scotty.html who Claim their work stolen
I do not know that the poser were stolen or not... I can only take precautionary action...
I am now however removing the results of the tag I created with that kit and when and if I find out more information then perhaps I'll be able to create a new tag.
The kit is called Parfait scrapkit and I'm sorry to say I do not know how much if any of it that may be stolen and am trying to find out.
I'll also be removing the header that was created for me by sugarspicebrat as I cannot be sure that any of the work in that is not stolen
If anyone has downloaded the kit on my recommendations I am trying to get more information about it and I am truly sorry that this has happened.
In the meantime I would suggest not using the kit until I do have further information.
Again I apologise for the inconvience and hope you will continue to visit my site...
Hugs Michelle
Friday, 23 January 2009
Template Freebie and New tag
Sunday, 18 January 2009
New Tags
Well that's about it for today Hopefully have a new template, mask and tutorial for you
Thursday, 15 January 2009
Ocean Queen Tutorial
Ocean Queen
This tutorial was written by Michelle Mills on 15th January 2009. Any resemblance to any other tutorial is purely coincidental. I claim all rights to this tutorial. Your results of this tutorial you are free to do with as you wish.
This tutorial assumes you have a working knowledge of Paint shop Pro.
The results of this tutorial were done in Paint shop Pro Ultimate x2.
Hugs Michelle
Supplies
Tubes of Choice or ones I have supplied here
http://www.mediafire.com/?sharekey=9a3332bb218e0ec091b20cc0d07ba4d264c41a7fe163d1f5
get misted scenic 56 here
http://www.mediafire.com/?nnnlwnmwlzt
Font of choice I used Black Chancery
Imagination... A definite must
Open a new 600x600 transparent image
Choose two colours from your main tube I have used foreground #bc3883
And background as #44a96f
Flood fill your image with background colour
Copy and paste as new layer sea spray and move to the left and down
See image below for approximate placement
Duplicate Sea spray layer and then mirror
Change Blend mode of both sea spray layers to luminance legacy
Copy and paste as new layer misted scenic 56 and change blend mode to Overlay
Copy and paste Whale in moonlight as new layer and move to the left change Blend mode to Luminance Legacy
Now move the Whale in moonlight layer to down should be above raster 1 our background colour
See image below for placement
Now make sure we are at the top layer and copy and paste as new layer Depp image and move to the right Change opacity to 50 and blend mode to soft light
Copy and paste as new layer Sea Goddess and then move to between the rocks
See image below for approximate placement I've closed off all other images to show approximate location adjust your image accordingly
Add a drop shadow V&H 15, Opacity 50, Blur 15, Colour Black
Right then we have our basic Tag
Let’s add our borders
Image add border and choose white 2 px
With magic wand replace, RGB value, Tolerance 0, feather 0 and anti-alias checked select our border
Flood fill with our background colour, keep selected
Effects>3d>Cut-out V&H 2, Opacity 50, Blur 5, Colour Black, select none
Image add borders 2px and use background colour
Image add borders 1px and use black
Image add borders 4px and use background colour
Image add borders 25px colour white
Use magic wand to select border and flood fill with background colour, Keep selected
Effect>Reflection Effects>Kaleidoscope with the following settings
Image add borders 4px colour white
Use magic wand to select border and flood fill with background colour, keep selected
Add drop shadow with V&H 1, Opacity 50, blur 1, colour black
Repeat drop shadow with V&H -1, select none
Image add border 1px colour black
And image add borders 2px colour background
Add your water mark and any text and copyright information your done
Resize your image, adjust sharpness and save you’re done
Hope you have enjoyed this tutorial
Hugs Michelle
Hi all
It appears that Mediafire is still having problems with some of my images and downloads
so for those that were not able to get the full downloads for Ocean Queen tutorial I have uploaded the depp image to 4shared.
can get it here http://www.4shared.com/file/81119975/9fa67e2c/bsccelebdepp004.html
Hugs Michelle
Tuesday, 13 January 2009
More Results
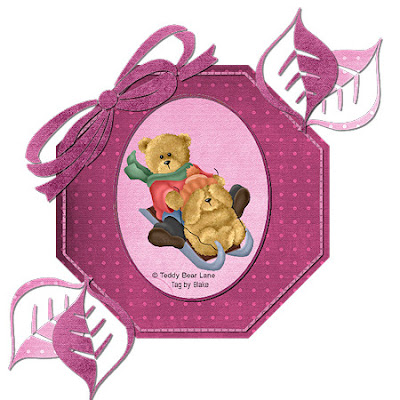
You can get the template here http://www.mediafire.com/?sharekey=9a3332bb218e0ec091b20cc0d07ba4d2ba795b3f16a27520
Sunday, 11 January 2009
Template Tutorial and New Freebie Template
How to Create a Template
Basic
Hi All
Recently I was asked how to create templates and if I could write a tutorial on how to do it
So here it is...
Templates are basic Frames that are created so that they can be filled in with colours or scrap paper etc to give the effect you like and decorate them to create your own unique tags...
This tutorial was written by Michelle Mills on 11th January 2009. Any resemblance to any other tutorial is purely coincidental. I claim all rights to this tutorial. Your results of this tutorial you are free to do with as you wish.
This tutorial assumes you have a working knowledge of Paint shop Pro.
The results of this tutorial were done in Paint shop Pro Ultimate x2.
Hugs Michelle
First create a new 600x600 transparent image
Rename layer to background flood fill with white
In your material Palette make your foreground transparent by clicking the little circle with cross through it.
Change your Background Colour to a dark grey
Go to your Selection tool and Choose Octagon, mode is replace, feather 0, anti-alias checked
Now pull out a shape to fill most of the middle section and fill with the dark grey.
Select none and move your shape to the middle of paper, Rename Layer Large Octagon
Select all Float and Defloat, then select>modify>Contract 15
Create new raster; Make sure new raster is selected
Select>Modify>select selection borders, outside checked, anti-alias checked, border width 4, click ok and then fill with a light grey, select none, Rename Layer Octagon Frame
Continue to rename your layers as you’re going along so you know where you are at
Choose a new shape, I Chose a Leaf pull out a shape to the size you like and then move it around to place where you like.
As this has pulled out on a vector layer
Convert to raster I now duplicated the raster layer and mirrored the new layer and then I free rotated by about 40 degrees and brought the leaves together
I have decided I like what I have so have duplicated both the leaf layers again
Flipped them and then mirrored them and then adjusted the position by moving until they sat where I liked them
I then used Selection tool again with Ellipse to create an oval and placed in the middle of my shape, convert to raster and select all>modify>contract 4 and then
Add new raster
Select all>Modify>select selection borders> Outside checked, anti-alias check border width 4 and filled on new raster layer with dark Grey
I then used another shape this time a ribbon and pulled that out
Converted to raster and free rotated by 40 degree and placed where I liked it.
Continue to use your light and dark grey or white if necessary
Use your shapes, Brushes or Selection Tools until you have a template you like and want to work with
When you have a template you like Save as a pspimage...do not merge your layers
And then try your new template for any problems...
You’re done
Hugs Michelle
Fo those that want this template eight you can get it from here
http://www.mediafire.com/?sharekey=9a3332bb218e0ec091b20cc0d07ba4d2ba795b3f16a27520
Please remember that you can share through groups only with a preview and link to my blog
Hugs Michelle
Here's a tag I created with the template
I used the beautiful artwork of Marcel Marlier
and the Very Pretty and fun scrapkit
In the country by http://www.bluedreamdesigns.co.uk/
Thank you for looking
Hugs Michelle
Friday, 9 January 2009
I Passed
Here is something I created today... Went horribly wrong but I actually like


