Earth Beauty
Hi All
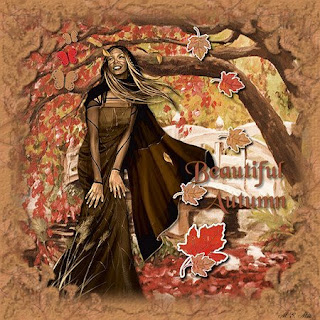
Well finally got to play again and here are the results and a basic tutorial for the tag. Sorry I don’t write the tutorials for animation yet as I am still learning it.
Please note I try to always give credit where credit is due. I always try to be copyright compliant but I receive a lot of Graphics and Tubes through groups and if I haven’t given proper credit please let me know so I can give proper credit or if you wish and it’s your to remove it.
Don’t forget to save often...
This tutorial was written by Michelle Mills on 26th November 2008. Any resemblance to any other tutorial is purely coincidental. I claim all rights to this tutorial. Your results of this tutorial you are free to do with as you wish. Please respect the TOU of the owner of the scrap kit.
This tutorial assumes you have a working knowledge of Paint shop Pro.
The results of this tutorial were done in Paint shop Pro Ultimate x2.
Hugs Michelle
Can use own supplies or supplies I’ve provided http://www.mediafire.com/?sharekey=9a3332bb218e0ec0ab1eab3e9fa335cae7e19483817b2fc2
Needed one tube of choice
I have used the beautiful artwork of Layanna http://www.layanna.ru/works.php
Mask of choice
I have used a mask called B_Sunny which I received through a group I will provide as supply
Open a new 600x600 transparent image
Pick two colours from your tube. I have used #fsc99d as foreground and #efc35c as background
Make a gradient with your colours foreground to background style is sunburst and then flood fill your new image.
Layer>new mask>from image and find your mask from the drop down list, source luminance and invert mask data checked. Merge group
Add a drop shadow for the mask layer. I used V&H 1, Opacity 20, blur 1 and colour #efc35c
Now Change your background colour in your materials palette to #cd601d
Add a new raster and flood fill with your new gradient and then move this layer to the bottom.
Open your tube and copy and paste as new layer and then duplicate this layer. Close off the top tube temporarily.
With the bottom tube go to Effects>artistic effects>chrome and using these settings
Flaws 1, brightness 100, use original colour ticked, and colour 732ac9
Reopen top tube and resize to 90% adjust sharpness once and add a drop shadow using
V&H 2, Opacity 50, blur 2 and colour #cd601d
Image>add borders 5 symmetric checked and then with magic wand with the settings of replace, RGB value, tolerance 0 now select the border, Flood fill with gradient
Invert and using cut-out with the following settings Vertical 1, Horizontal 1, opacity 10, blur 10, shadow colour black
Invert and using the clone brush fill inside of the border area using swirly patterns of your tags background. Select none
Image>add border 1 symmetric checked colour black
Image>add borders 10 any colour except black
With magic wand select the border, flood fill with the gradient, invert, use cut-out again with the same settings as before
Invert and used the clone brush again to fill the border area. Select none
Image> add borders 2 colour black
Image> add border 20 colour any but black
With magic wand select the border, flood fill with gradient, invert, use cut-out as before
Invert and use the clone brush again to fill the border area, do not deselect
Effect>3d effects>inner bevel with the following settings
Bevel 2, width 12, smoothness 16, depth 4, ambience 0, shininess 0, colour white, angle 315, intensity 50, elevation 30
Invert and inner bevel with the same settings, do cut-out for the last time, and select none
Add your text now and your watermark
Resize and sharpen once and save... If you wish to animate or add sparkles now is the time to do so
You’re done ... Thanks for trying this tutorial... Hope you enjoy
Hugs Michelle