Friday, 23 January 2009
Template Freebie and New tag
Sunday, 18 January 2009
New Tags
Well that's about it for today Hopefully have a new template, mask and tutorial for you
Monday, 5 January 2009
New Template and Tags
Friday, 5 December 2008
New Tutorial-Autumn Starr
Golden Goddess
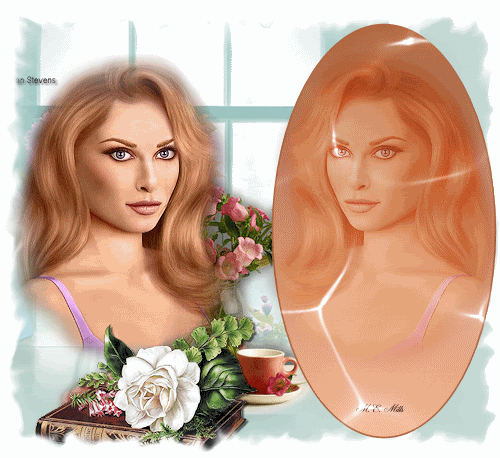
This tutorial was written by Michelle Mills on 05th December 2008. Any resemblance to any other tutorial is purely coincidental. I claim all rights to this tutorial. Your results of this tutorial you are free to do with as you wish. Please respect the TOU of the owner of the scrap kit.
This tutorial assumes you have a working knowledge of Paint shop Pro.
The results of this tutorial were done in Paint shop Pro Ultimate x2.
Hugs Michelle
For this tag I have used the beautiful artwork of Ana Rasha http://anarasha.deviantart.com
I have also used a beautiful scrap kit by Stacey called Scorpio check out her site here http://www.snmcreationz.blogspot.com/
Or purchase the kit here http://www.sweetnsassydigiscrappers.com/store/
Ok here we go.... Remember this is your tag have fun
Create a new 550x630 transparent image
Flood fill with white
Open and copy and paste as new layer paper 10
Layer>new mask>from image and from drop down list select your mask
Merge group
Duplicate mask layer and merge down. Add drop shadow I used V&H 2, opacity 20, blur 2 colour black
Copy and paste as new layer, resize as necessary don’t forget to sharpen if resizing. Add a drop shadow of choice
New raster
Select all copy and paste into selection paper 4 and then modify and contract by 10 and delete
Invert add inner bevel with following settings
Bevel2, width 2, smoothness 0, depth 2, ambience 0, shininess 0, colour white, angel 315, intensity 50, elevation 35
Invert copy and paste as new layer paper 10, select>modify> contract 3 and delete select none
Select all> float then select>defloat add inner bevel to paper 10 layer select none
With magic wand click inside small gold layer just done and then add new raster
Copy and paste as new layer paper 4, select>modify>contract 15 and delete, select none
Select all>float, select>defloat and add inner bevel again and select none
Image>canvas size and add 50 all around
Copy and paste as new layer your doodle and resize to 25%, sharpen and move to top of frame middle and add drop shadow
Duplicate layer and image>flip
Copy and paste as new layer the bow resize to 15% and then move to top right, add a drop shadow of choice
Copy and paste as new layer butterfly and resize to 25% move to top right and add drop shadow
Duplicate butterfly layer and mirror
Copy and paste star and resize to 20% and place, make up a signature with brush and place over start
And add font with made up name
Copy and paste as new layer journal tag resize to 25% move to lower left corner add drop shadow
Type autumn
Copy and paste as new layer pen and resize to 30% and place over the tag a little add drop shadow
Add your watermark and any copy right information resize and save
Thanks for trying my tutorial
Hugs Michelle
Thursday, 4 December 2008
Freebie- Template
Friday, 28 November 2008
Ocean Dreams
Ocean Dreams
Hi all got to play again and create a new tag and tutorial. This tag is called Ocean Dreams.
For this tag you can use your own tubes or the tubes and mask I have supplied here http://www.mediafire.com/?sharekey=9a3332bb218e0ec0ab1eab3e9fa335ca931626dbf127e922
Supplies three tubes of choice Or Supplies I have provided
Mask I used one called ONE was sent through groups so do not know who made it
And a scrap kit I have used a beautiful scrap kit called Sagittarius by Stacey at www.snmcreationz.blogspot.com/ and can be purchased at Sweet N Sassy www.sweetnsassydigiscrappers.com/store/ a visit to these sites will not be a disappointment.
I have also used a plug-in called xero radiance, and xero softmood
Font of choice, I used Ancestry SF @ size 55
This tutorial was written by Michelle Mills on 28th November 2008. Any resemblance to any other tutorial is purely coincidental. I claim all rights to this tutorial. Your results of this tutorial you are free to do with as you wish. Please respect the TOU of the owner of the scrap kit.
This tutorial assumes you have a working knowledge of Paint shop Pro.
The results of this tutorial were done in Paint shop Pro Ultimate x2.
Hugs Michelle
Please note I try to always give credit where credit is due. I always try to be copyright compliant but I receive a lot of Graphics and Tubes through groups and if I haven’t given proper credit please let me know so I can give proper credit or if you wish and it’s your to remove it.
Open all your supplies and scrap kit
Create a new 550x350 transparent image.
Open paper 10 from the Sagittarius scrap kit and copy and paste as new layer on your transparent image.
Layer>new mask>from image from your drop down list select your mask, source luminance and invert mask data checked
Open your ocean tube copy and paste as new layer. Image>mirror and duplicate your layer
Open your lady tube copy and paste as new layer. Resize lady layer 70% adjust>sharpness>sharpen once. Move tube to the right top just above ocean waves. See my image for placement.
Move lady layer beneath your ocean layers. Add drop shadow V&H 2, Opacity 30, blur 2, colour black.
Now Use plug-in xero radiance with the following settings: strangeness 48, charm 97, truth 224, beauty 159
Open your man tube copy and paste as new layer. Make sure it is the top layer and then resize to 70% Adjust>sharpen once. Add same drop shadow
Move your man to the bottom left so his arm and elbow just start at the rocks...See my image for placement
Now use plug-in xero softmood with the following settings: Haziness 240, glow-red 178, green 178, blue 178, lock slider checked, brightness -51, contrast -7.
Your basic tag is done we now need to put it on a background and embellish it a bit. So save now Ocean Dreams.
Open your tagger mat and duplicate and close original.
Then copy merged your basic Ocean Dreams tag and paste as new layer on your tagger mat, it will fit perfectly.
Add your favourite embellishments.
I have used tag 1 resized to 30% and free rotated left 15 degrees. Add drop shadow and move to top left. See image for placement
Heart hanger resized to 30% and placed top right. Add drop shadow
Tagger belt adjusted to fit across the bottom using pick tool. See image for placement. Add drop shadow
Add your text. Colours I used foreground #01ced1 and background #ddfafa
Add your watermark and merge all resize and save
Your done hope you had fun and enjoyed this tutorial. Thanks for trying
Hugs Michelle
Thursday, 27 November 2008
New Tag
Thanks for looking
Tuesday, 18 November 2008
New Tutorial- Beauty
Hope your having a great night. Just like to say a big thank you to all those that have tried my tutorials and am glad you are enjoying them.
Well I have written another tutorial tonight it is from a PTU kit I have used before. I love this kit. It has so many possibilites. The kit I have used is called Libra I have used the Tagger size kit for my tags.
Thank you again Stacey for the beautiful Kit
Ok then so here is the results of my tutorial and of course the tutorial itself
Hope you enjoy
Hugs Michelle
Beauty
Hi all I’ve created a new tut tonight using a beautiful PTU scrap kit called Libra by Stacey which I have used before it really is a beautiful kit though can be found at www.snmcreationz.blogspot.com/ and can be purchased at Sweet N Sassy www.sweetnsassydigiscrappers.com/store/ a visit to these sites will not be a disappointment.
Please note I try to always give credit where credit is due. I always try to be copyright compliant but I receive a lot of Graphics and Tubes through groups and if I haven’t given proper credit please let me know so I can give proper credit or if you wish and it’s your to remove it.
Don’t forget to save often...
This tutorial was written by Michelle Mills on 18th November 2008. Any resemblance to any other tutorial is purely coincidental. I claim all rights to this tutorial. Your results of this tutorial you are free to do with as you wish. Please respect the TOU of the owner of the scrap kit.
This tutorial assumes you have a working knowledge of Paint shop Pro.
The results of this tutorial were done in Paint shop Pro Ultimate x2.
Hugs Michelle
Supplies scrap kit, tube of choice
I have used the beautiful art work of Lorine Pimenta www.lorineart.com
Don’t forget to have fun, it’s your tag
Hugs Michelle
Open a 600x600 transparent image and then copy and paste as new layer paper 7
View and rulers and with your selection tool settings circle, replace, feather 0
Find the middle of the circle which is 300x300 and pull out a circle until the third ring or second of the muti-coloured rings.
Invert and Delete then select none.
Add a drop shadow I used V&H 2, Opacity 30, blur 2, and colour black and then add drop shadow again with V& H 2 and all else as before.
Resize circle to 70%
Next add the double frame resize to 50% add a drop shadow.
Move to left side of circle
Open paper 3 copy and paste as new layer.
Move the paper layer under the double frame and then with magic wand with the settings add RGB Replace, feather 0 go to your frame layer click inside both parts of the frame then select>modify>expand 5.
Go back to your paper 3 layer Now select>invert and delete. Select none
Add your tube and move to the right of the frame. See my image for placements
Add your drop shadow
I’ve then used the Flowers and resized to 40% sharpened once.
I then duplicated the flower layer twice.
Go to top layer of flowers mirror and then free rotate by 15 degrees left, move flowers to right of circle add drop shadow.
I erased one flower as it I felt it was necessary not to block too much of my image.
Middle layer flower free rotate right by 15 degrees move to middle of circle add a drop shadow
Bottom layer flowers free rotate 20 degrees left and place to right of circle. Add drop shadow. Then move this layer to under the paper 3 layer.
See my image for placements.
I then added butterfly resize to 20% sharpen once and move to inside the frame on left and add drop shadow then duplicate and move the duplicate butterfly layer to over the middle of the double frame. See my image for placement.
Then add heart on string and resize 20% sharpen once and move to inside right side of frame move layer between frame and paper. Add drop shadow
Get your swag element or ribbon and resize to 25% and using your pick tool rotate your ribbon so as to line it up so that sits nicely over your base of frame.
Sharpen once and add drop shadow duplicate this layer.
Mirror your duplicate layer place over left bottom frame and erase any extra that is too long
See my image for placement.
That’s it add any text you like in font of choice.
Resize your whole image and add your watermark and copyright information if required
Save your tag your done
Hope you enjoy this tutorial
Don’t forget it’s your tag. Have fun try other elements etc
Thanks for trying it Hugs Michelle
Saturday, 15 November 2008
New Results- and -Devastation Tutorial
I have done a new tag tonight
thought just show the results
I may have tutorial written up on monday.
For this tag I used the fantastic artwork of Annika Smidt http://www.apfelkeks.de/
I have also used a beautiful FTU Scrapkit called Autumn Caprice http://krakatukasmagicbox.blogspot.com/
Ok here are the results
Hope your all having a great night
Ok I have also managed to get the tutorial written up sooner than I expected for devastation tag
so here is the tutorial for Devastaton For image see yesterdays post
Devastation Tutorial
Well as promised here is the tutorial for tag Devastation.
This tutorial was written by Michelle Mills on 15th November 2008. Any resemblance to any other tutorial is purely coincidental. I claim all rights to this tutorial. Your results of this tutorial you are free to do with as you wish. Please respect the TOU of the owner of the scrap kit.
This tutorial assumes you have a working knowledge of Paint shop Pro.
The results of this tutorial were done in Paint shop Pro Ultimate x2.
Supplies needed
I have uploaded some of the supplies I used here http://www.mediafire.com/?sharekey=9a3332bb218e0ec0ab1eab3e9fa335ca9bc9c0551676068f
To create this tag I have used the beautiful artwork of Adam Byrne http://www.burncomics.com/
I’ve used a template called bc_template_12* http://beacreations.blogspot.com/
Mask I’ve used nic-grunge 32 unfortunately I do not know where this came from
If anyone knows please let me know so I can give credit
Font of choice I have used Lucida handwriting
Scrap kit of choice I’ve used a FTU scrap kit called Seductive grunge by sophisticated scraps http://techgroups.yahoo.com/group/sophistiactedscraps/ or here http://sophisticatedscraps.blogspot.com/
Alrighty then onward we go. Nice easy tag we’ll sort out the template first and then add our tube and embellishments.
Open your supplies in psp
Open your template and duplicate it and close the original.
Let’s start from the bottom and work to the top. I haven’t changed the name of the layers but if you need to of course do so.
Go to layer Hintergrund layer add a new raster layer make sure this is your active layer and then select all and open your paper 6 and copy and paste into selection.
Layer>New mask>from image and make sure invert mask data unchecked
Go to Kreis layer and select all> float> defloat and open paper 1 copy and paste into selection.
Add a drop shadow I used V&H 1, Opacity 50, Blur 1 colour Black and then I repeated drop shadow with V&H -1 all other setting stay the same.
Go to striche kreis layer and select all> float> defloat and then copy and paste into selection paper 8 add drop shadow here I used V&H 2, Opacity 50, Blur 2, colour black
Go to abger, Rechteck layer and select all> float> defloat copy and paste into selection paper 3 and add same drop shadow
Go to layer Rechtech select all> float> defloat copy and paste into selection paper 9
Go to Rahmen Rechteck select all>float>defloat copy and paste into section paper 8 add an inner bevel of Bevel 2, width 12, smoothness 16, depth 4, ambience 0, shininess 0, colour white, angle 315, intensity 50, elevation 30
Add your drop shadow
Go to Dia layer select all>float>defloat copy and paste into selection paper 9
Go to Rahmen Dia layer select all> float> defloat copy and paste into selection paper 8 add an inner bevel as before and then add your drop shadow as before
Delete your Blume layer as won’t be using it and also can delete copy right information layer
Ok let’s add our tubes
Go back to your rechteck layer select all> float> defloat and add a new raster .
Make sure your new raster is your active layer and copy and paste into selection your tube adjust as necessary. Add a drop shadow to your tube. I used the usual
Now go back to your Rahmen Dia layer and with your magic wand click inside the top frame area
Select>modify>expand 4 add a new raster and make sure it is your active layer and paste into selection your next tube. Change the blend mode to luminance
Do the same for the middle image to be added to the frame but change the blend mode to luminance legacy this time
And then do the same to the third part of the frame and change the blend mode to luminance
Select the Rahmen Dia layer and move it to the top
Now add your elements
I used the broken heart badge which I resized to 30 adjusted the sharpness once and added a drop shadow to. I free rotated by right by 30 degrees and placed about where the Blume layer was. See my image for placement.
I also used doodle 3 I resized by 50% adjusted sharpness once added a drop shadow and duplicated the layer. The first doodle I free rotated to right by 20 degrees and placed on the top of the Rahmen Dia layer. I then carefully erased part of the doodle to look as if weaving around things. See my images
The second doodle I mirrored and duplicated that layer again and put one between the Dia layer and the Rahmen Rechtech layer and the other moved to the very top of all my layers. I selected the very top layer and again I carefully erased areas to look as if it is weaving. I also had to erase a very small amount bottom most doodle layer to look right. See image
Well that’s it for this tutorial remember of course this is your tag. Have some fun play a little try different things.
I hope you enjoyed this tutorial
Hugs Michelle
Sunday, 9 November 2008
Sweet as Sugar-Tutorial-PTU


This tutorial assumes you have a working knowledge of Paint shop Pro.
The results of this tutorial were done in Paint shop Pro Ultimate x2.
Hugs Michelle
Supplies
I have used a mask sg_stencilled-floral-diamond this was sent through a group I do not have the details of where it came from. You need a tube of choice and a font of choice I used Chuzzelwit SF and I have used a beautiful scrap kit called Sugar N Spice by Stacey at www.snmcreationz.blogspot.com/ and can be purchased at Sweet N Sassy www.sweetnsassydigiscrappers.com/store/ A visit to these sites will not be a disappointment.
Open paper 5 copy and paste as new layer and then go to layer>New mask > from image select your mask from drop down list and source luminance and I had to invert with my mask.
Merge group and then add a drop shadow I used V&H 1, Opacity 30, and blur 1, colour black. Add new raster and select all and then add paper 4 and do the same as before with your mask. After you have added drop shadow on this mask layer free rotate right 45 degrees and then move this mask layer below the first mask layer.
Open your ribbon frame and then copy and paste as new layer make sure it’s on the top layer. Resize to 70%. Don’t forget to adjust and sharpen once. Add drop shadow I used the same throughout.
I then added my Daisy Flower and resized to 20% sharpened and moved to right corner of frame I added a drop shadow the same throughout and then duplicated flower layer and free rotated 45 degrees. I then opened Pink flower 1 and copy and paste as new layer resized to 20% adjusted sharpened and then added drop shadow and moved to be in the middle of other flower. See image for placement.
I then opened sugar and spice butterfly and copy and pasted as new layer resized to 15% sharpened and then moved to bottom left of frame I added a drop shadow. Free rotate 25 degrees to the left and then I then duplicated the layer twice and moved each a little down. See image for placement.
Now open and add your tube and place where you think best as mine is quite a large and I left it where it automatically place it..Add your drop shadow
I now opened and copy paste as new layer the journaling box and then resized to 30% adjusted sharpness and added drop shadow. I moved it to top left corner and put it under the tube. See image for placement.
Add any text you like.
I at this point decided to extend canvas from 600x600 to 650x650 do this by image>canvas size and just changing the width and height and make sure placement is middle.
I then opened and copy and pasted as new layer the handbag and resized to 20% sharpened and added drop shadow... see image for placement.
I then opened and copy and pasted as new layer the pink butterfly. Resized to 20% sharpened and added drop shadow. And moved over the top of handbag handle. See image for placement
Finally I opened and copy and pasted as new layer the flower jar and then resized to 25% adjusted sharpened and added drop shadow and then placed it right at the front on right side. See image for placement.
Add your watermark merge and flatten resize if you like and save you’re done.
Well I hope you enjoyed this tutorial. Remember Save often and remember it’s your tag. Have fun. This is just a guide
Thanks for looking
Hugs Michelle
Saturday, 1 November 2008
New Tutorial- Broken Hearted
I Hope you've all had a good day. I've written another tutorial tonight called Broken Hearted. I have decided for now not to write a tutorial for Offering. Perhaps in the future
I hope you all like my new tutorial and of course I would love to see results
So here we go
Thanks for looking
Hugs Michelle
Broken Hearted
This tutorial was written by Michelle Mills on 1st November 2008. Any resemblance to any other tutorial is purely coincidental. I claim all rights to this tutorial. Your results of this tutorial you are free to do with as you wish. Please respect the TOU of the owner of the scrap kit.
This tutorial assumes you have a working knowledge of Paint shop Pro.
The results of this tutorial were done in Paint shop Pro Ultimate x2.
Hugs Michelle
I actually did two versions I wasn’t sure of one so removed the text I added I will post both versions here.


Supplies
I used spudmask-02 which you can get here www.friendskorner.com/forum/photopost/showphoto.php/photo/5467/cat/views/size/big/limit/views
A tube of choice
Font of choice I used English157 BT Optional
I have used a beautiful scrap kit called Broken Hearted by Stacey at www.snmcreationz.blogspot.com/ and can be purchased at Sweet N Sassy www.sweetnsassydigiscrappers.com/store/ A visit to these sites will not be a disappointment.
Please note I try to always give credit where credit is due. I always try to be copyright compliant but I receive a lot of Graphics and Tubes through groups and if I haven’t given proper credit please let me know so I can give proper credit or if you wish and it’s your to remove it.
Don’t forget to save often...
Open your mask tube and scrap kit
Create a new 600x600 transparent image and flood fill with white.
Open paper 6 and copy and paste as new layer. Go to layer > new mask> from image choose your mask from drop down. Leave invert mask unchecked.
Add a drop shadow of choose. Mine is V & H 2, opacity 60, blur 2, colour black. This tends to be my standard.
Open your Broken Heart resize to 40% adjust>sharpness> sharpen only once and then copy and paste as new layer. Free rotate 10 degree to the right and place at the top left corner. See my image for placement. Add drop shadow.
Open your tube and copy and paste as new layer. Resize as necessary don’t forget to sharpen if you resize and place where you like it best.
Now add other elements from the scrap kit. Here’s what I did. It’s only a guideline experiment have fun. Remember it’s your tag.
On my tag I used double flower resized to 15% sharpened once and then duplicated it 7 times and moved them around as I liked. I mirrored the seventh double flower. I then closed all layer apart from the double flowers merged visible and then added a drop shadow. Open your closed layers.
I also used the heart bow charm resized to 30% adjusted sharpness, free rotated by 10 degrees left and placed to the right of image and added a drop shadow. I moved this layer under the tube layer. See my image for placement.
I added star tag also resized to 30% adjusted the sharpness. See image for placement. To have the ribbons come over the flowers I duplicated the tag layer and the flower layer. I placed one tag layer under the tube layer and the other tag layer between the two flower layers. I then went to the top most tag layer and erased a little of the ribbon from off the tube so it was off the face. I then went to the top most flower layer and erased some of the flower parts to allow the ribbon to show. I then also erased a couple of petals to look like they were entwined with the tag. This is all optional. See image to get idea.
I then added text to the tag and free rotated that text by 20 degrees and added drop shadow
I used what becomes word art and resized to 30% adjusted sharpness and placed to the left of the tube. See my image for placement and then added a drop shadow.
That’s it. Merge flatten, resize and sharpen add your watermark and save your done.
Hope you enjoy this tutorial.
Hugs Michelle
Tuesday, 28 October 2008
New Tutorial TWO FACES
I hope you enjoy this tutorial as much as I had writing it and love to see your results
Thanks and Hugs Michelle
TWO FACES
This tutorial was written by Michelle Mills on 28th October 2008. Any resemblance to any other tutorial is purely coincidental. I claim all rights to this tutorial. Your results of this tutorial you are free to do with as you wish. This tutorial assumes you have a working knowledge of Paint shop Pro. The results of this tutorial were done in Paint shop Pro Ultimate x2.
Hugs Michelle
Here is a picture of my results

I have used a PTU kit by Stacey called Libra which you can purchase @ www.sweetnsassydigiscrappers.com/store/
I also used a plug-in called xeros that has porcelain but this is completely optional...I just love the results it gives
I have also used the beautiful artwork of Gail Gastfield @ http://www.gailgastfield.com/
First open the scrap kit and Your Tube of choice in Psp
Open a new 600x600 transparent image
Copy and paste Ribbon frame onto your new image and then image resize to 60% and uncheck resize all layers
Using your magic wand click inside the frame and also shift and click all the places where there are gaps around the bottom of the ribbon four little gaps. Now selections modify and expand by 3.
Copy and paste paper 7 then move it underneath the frame and keep the paper layer selected and selection invert and then hit your delete key and your paper should be under the frame and excess now removed. Deselect at his point but using your magic wand again select inside of your frame only and then select modify and expand by 3 again.
Now add new raster and send or move to the top open your tube and copy and then paste into selection on your tag. Deselect.
Add a drop shadow of choice I used V and H of 2, Opacity of 60 and blur of 2, colour black and now comes the optional part I have used xeros porcelain at default settings.
Now add a drop shadow to our frame I’ve used the same settings as above. Then merge down
Now open frame and copy and paste as new layer on your tag then resize to 60% making sure resize all layers unchecked and then add same drop shadow again to this frame
Now slightly tricky bit zoom into you tag as we are going to erase some of the frame in the bottom to weave into the ribbon again purely optional but I like the effect. Using a small erasing brush choose the pieces you’d like to look weaved through ribbon see image for which parts to weave now merge down again.
Now open your flower cluster and again copy and paste to your tag resize to 20% and then adjust sharpness sharpen just the once now flip and then image mirror and move to your left corner of your frame see image for placement. Duplicate your flower cluster layer and then image and mirror and merge down then add drop shadow again same as before.
Open pale green ribbon tag copy and paste as new layer and then resize to 30% adjust sharpness once move to the bottom of your frame between the ribbon see image for placement. Add the same drop shadow again and then optional again but zoom in and erase a small part of the ribbon to wrap the lager ribbon on the frame and erase a small amount of the green tag to look as if under the ribbon on the frame.. See image
Add some text to the tag either the word text included in the kit or your name choose colours from the frame I choose green as foreground and pink as background and added my name and then used drop shadow of V&H -2, opacity 60 and blur of 2 but colour foreground colour
Merge visible and resize your done Add your watermark and any copyright details
As this was very personal tag for me expressing the depression I suffer and the face of happiness I often display to the world I have added some text to the tag this is not necessary but entirely up to you
Thanks for trying this tutorial I hope you enjoy it
Hugs Michelle